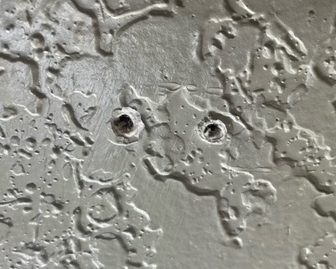
How To Patch a Nail Hole

Whether your lease is almost over and you are moving out (and, hopefully, taking your security deposit with you) or moving into a house that has some holes, filling holes is a must and it is very simple. If you follow these tips and tricks, it will even be hard for you to find the hole after your done.
Not all holes are created equal, small holes are generally faster and easier to fix than larger holes. There are generally two types of holes left after removing the screw or nail. If first is a screw( or nail) that was placed directly into the drywall and into a stud. The second and more common is a hole that has a plastic drywall anchor inside. These anchors are used when the picture does not hit a stud. Most people are tempted to leave the anchor to ensure they do not make a larger hole, but this is wrong. Use a screw driver or pair of needle-nose pliers to remove the plastic insert. Sometimes it helps to use a drill and drill-bit into the center of the insert to break it into smaller pieces for removal.
Supplies That You Will Need
- Spackle
- Putty knife
- Fine-grit sandpaper
- Needle nose pliers
- Paint and Paintbrush
Now that you have a hole with no drywall anchor inside, follow these steps:
1. Clean Up The Hole
Before starting to fix the hole, run your putty knife over the hole and ensure the edges of the hole are not higher than the rest of the wall. If this is the case, use the back of your putty knife (rounded corner) to indent that section at least back to even with the wall. Next check for chipped paint, or drywall fibers that may be sticking out. These can cause problems later so it is best to remove them now.
2. Apply Spackle
Using the sharp corner of your putty knife, scoop out a small amount of spackle and gently fill the hole. Using the flat section of the knife to smooth it out. Keep this as small as possible especially if you have textured walls.
3. Let Spackle Dry
I generally use “DAP DryDex Spackleing” from Lowe’s, as this product starts out pink and changes color to white when it is dry. This process happens within a couple hours from small holes.
4. Sand The Spackle
If you left some extra spackle around the hole, now is when you use the fine grit sandpaper to sand back to original paint. Be sure to wear a mask when sanding. If you accidentally over sanded creating a divet, just add more spackle and start again. Be sure to wipe drywall dust off prior to applying spackle. This step can be skipped it your walls have texture as its easier to match since its not flat.
5. Paint The Area
Once the hole is flush and dry, its time to paint. Be sure to stir your paint. If you need help matching paint click here “How To Match Existing Paint“. Using a small paintbrush, paint the affected area.
If you have questions, or need help filling nail holes, feel free to contact BranSun Services.
Frequently Asked Questions
How large of a hole can I patch with this method?
Holes up to 1/2″-3/4″ can use this method. Holes larger than that should have reinforcing added.
Do I need to remove the drywall anchor?
Yes, be sure to remove the drywall anchor.
Should I use “spackle” or “drywall compound”?
Either can be used, but spackle will not shrink like drywall compound so it is better suited for small holes.